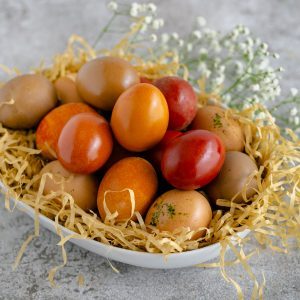
Colouring eggs for Easter is not only fun but simple too. If you haven't tried dyeing your Easter eggs the natural way, then this time you must! Get the kids involved and show them the power of using natural ingredients!
It is a great way for them to learn about using naturally made products as opposed to store bought. So let's show you how to make amazing colours using some of our favourite natural ingredients. The results might just surprise you!
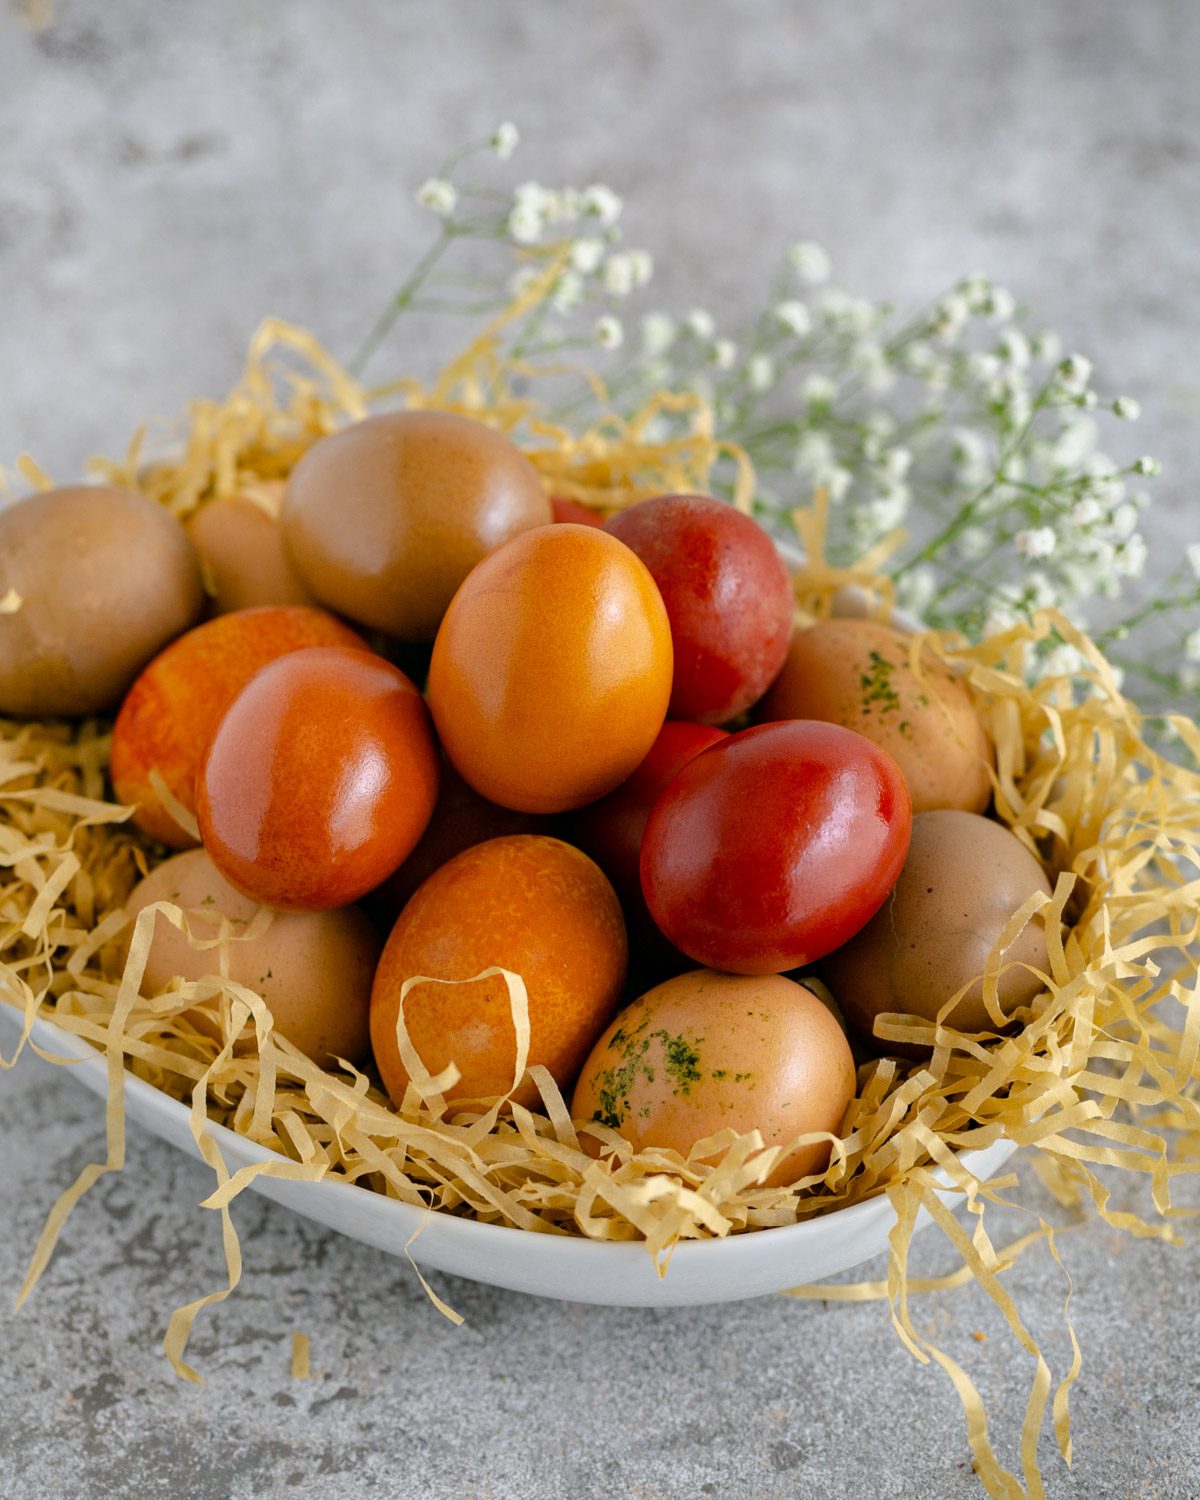
Easter without colourful Easter eggs? No way!! Not in our house. One tradition that we religiously follow is dyeing eggs every year and eating them on our Sunday Easter brunch.
Jump to:
tradition of dyeing eggs
Do you know, how the tradition of dyeing eggs for Easter came about? Well, it goes all the way back to the middle ages.
During Lent, before Easter, no meat and eggs were consumed so people cooked their eggs to make them last. In order to distinguish between the cooked eggs and the raw eggs, they started colouring them. At that time, no synthetic colours existed so people used vegetables, fruits, roots, bark to dye their eggs. And that’s how decorating eggs at Easter came about!
So let's keep this tradition alive by using natural ingredients to make colourful Easter eggs!
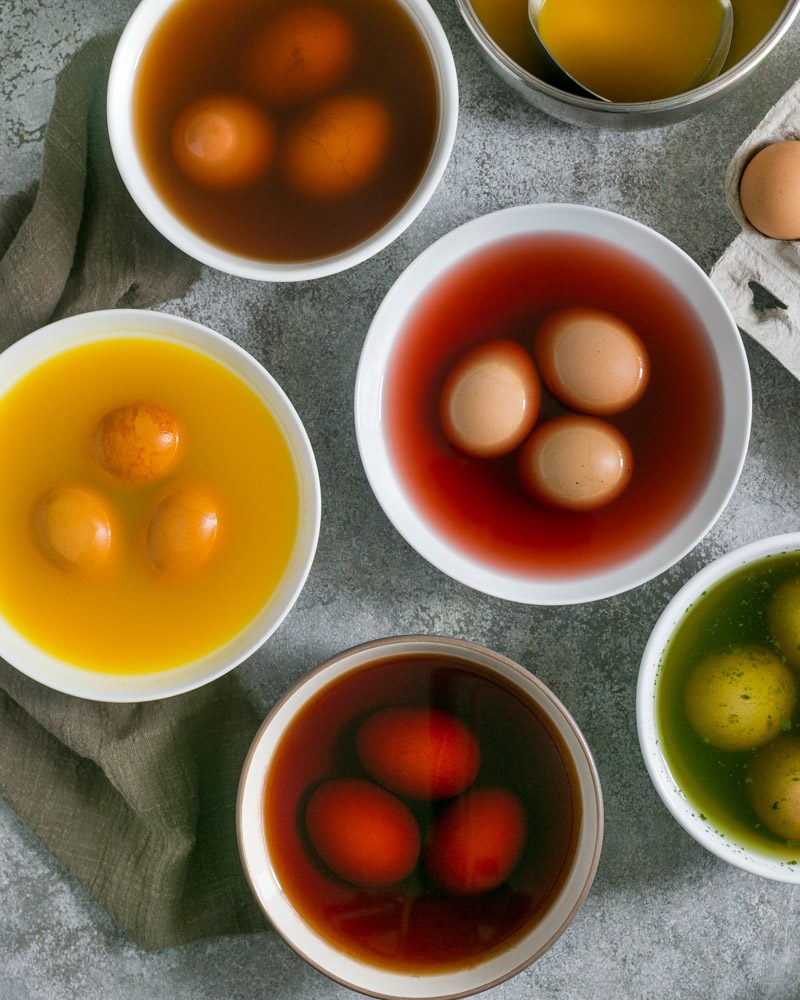
How to dye eggs naturally?
We have experimented with natural colours for a couple of years now and every year the results are slightly different.
There are surprises and sometimes few disappointments but that's okay because we are here to share our experiences. Like you, we too keep learning and discovering😉 To see how it's done watch the story here.
With Red Onion peels
The most consistent colouring effect comes from onion peels, especially red onion peels. They alone give such a dark red tone. Using red onion peels has never let us down, the results have been pretty much the same over the years.
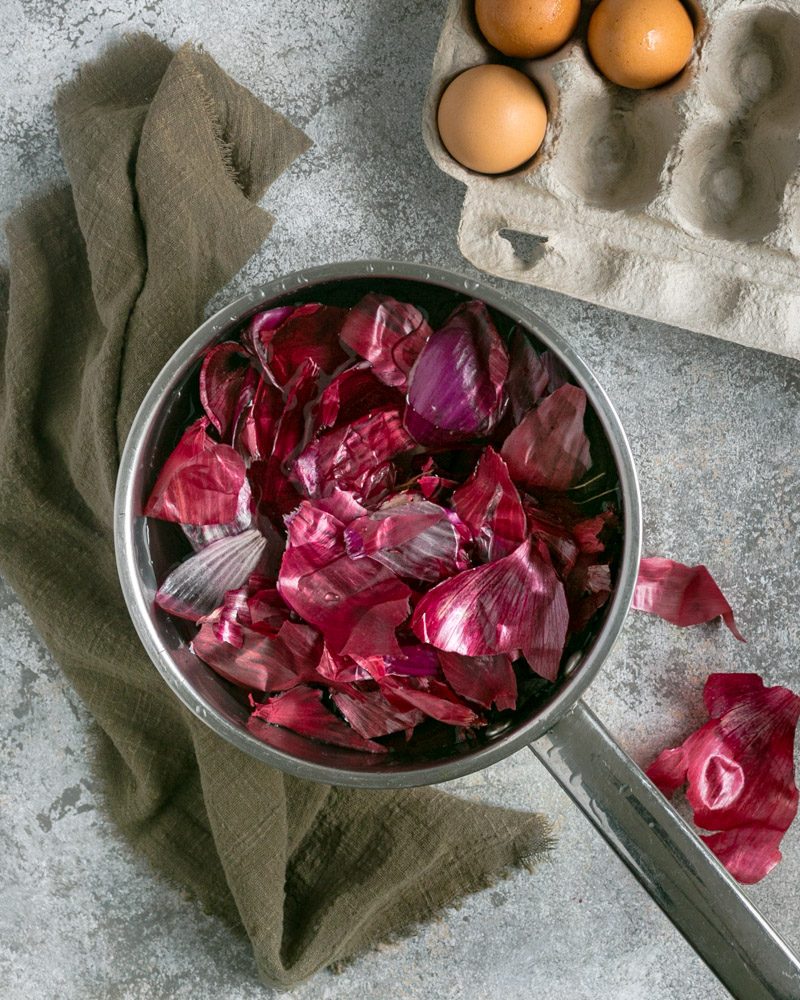
For 500ml water we used the peel of 4 medium red onions. We boiled the peels for 20 minutes with one teaspoon of white vinegar and strained the water afterwards. Then we boiled the eggs for 15 minutes in the red onion water.
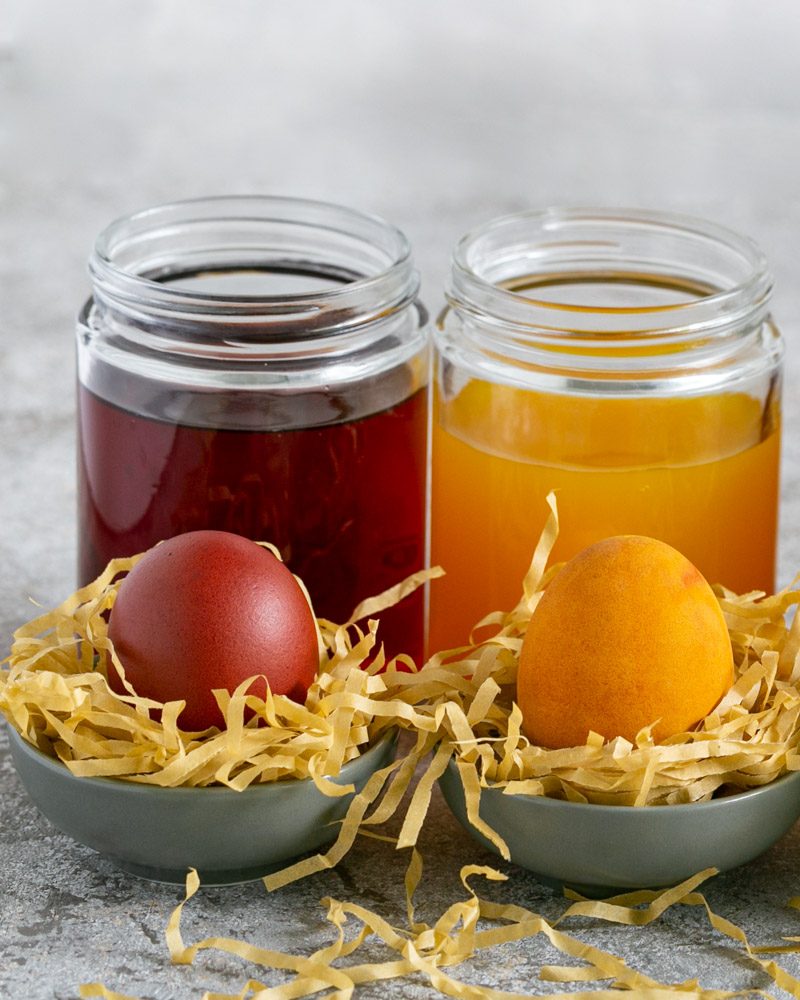
With Turmeric
Instead of using turmeric root we used turmeric powder. For 500ml water 1tbsp turmeric powder was enough. Make sure to bring it to a boil first and cook the turmeric water for 5 minutes before adding the eggs to make sure the powder has fully dissolved.
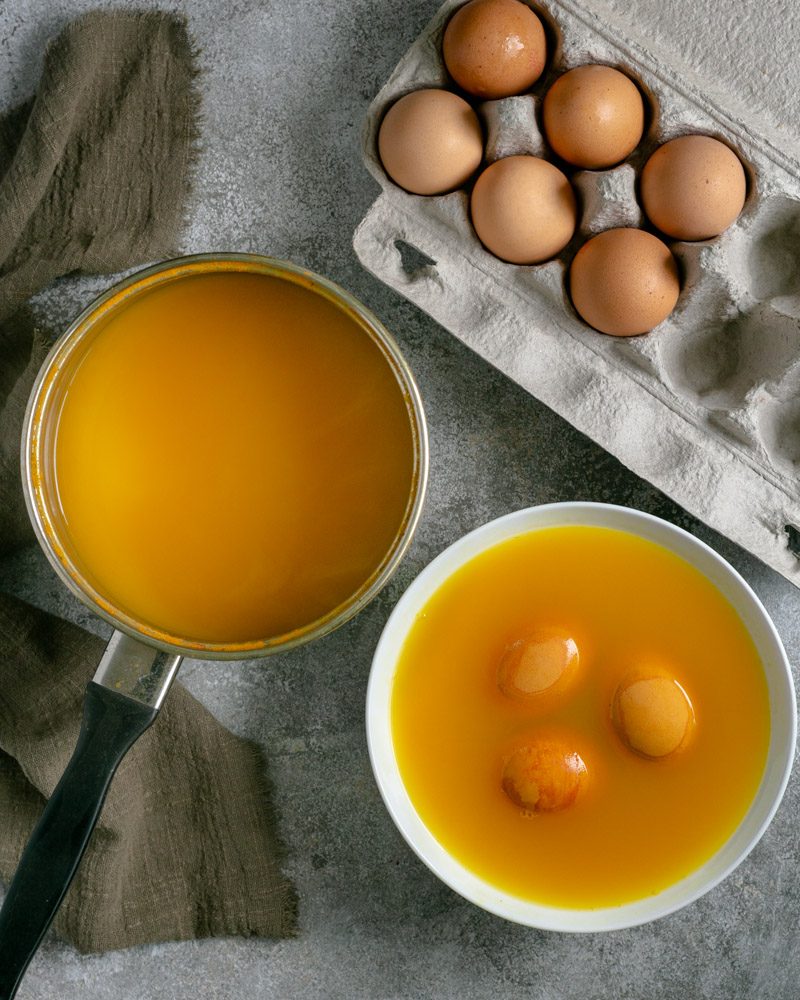
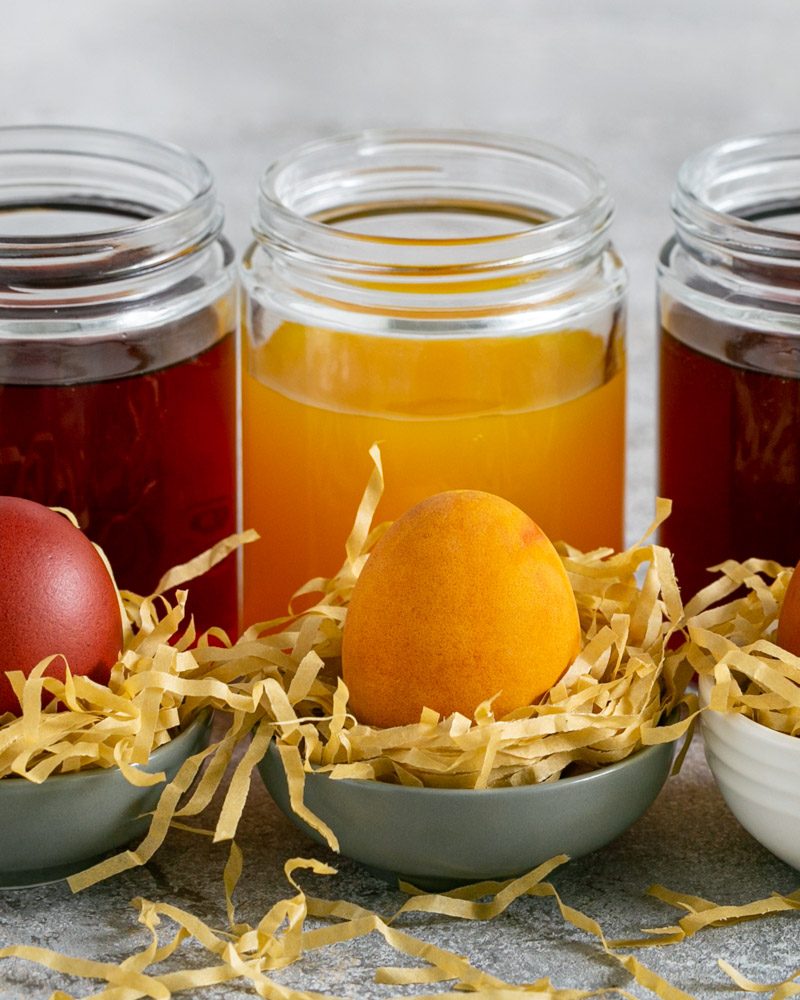
Then cook the eggs for 15 minutes in the water. Last year we got an egg yellow in colour but this year it came out more orange than yellow, another pleasant surprise.
With Brown Onion peels, Cinnamon and Coffee powder
We tried this combination for the second year in a row and are quite happy with the rusty brown colour it gives. The eggs not only look great but they also smell amazing because of the cinnamon.
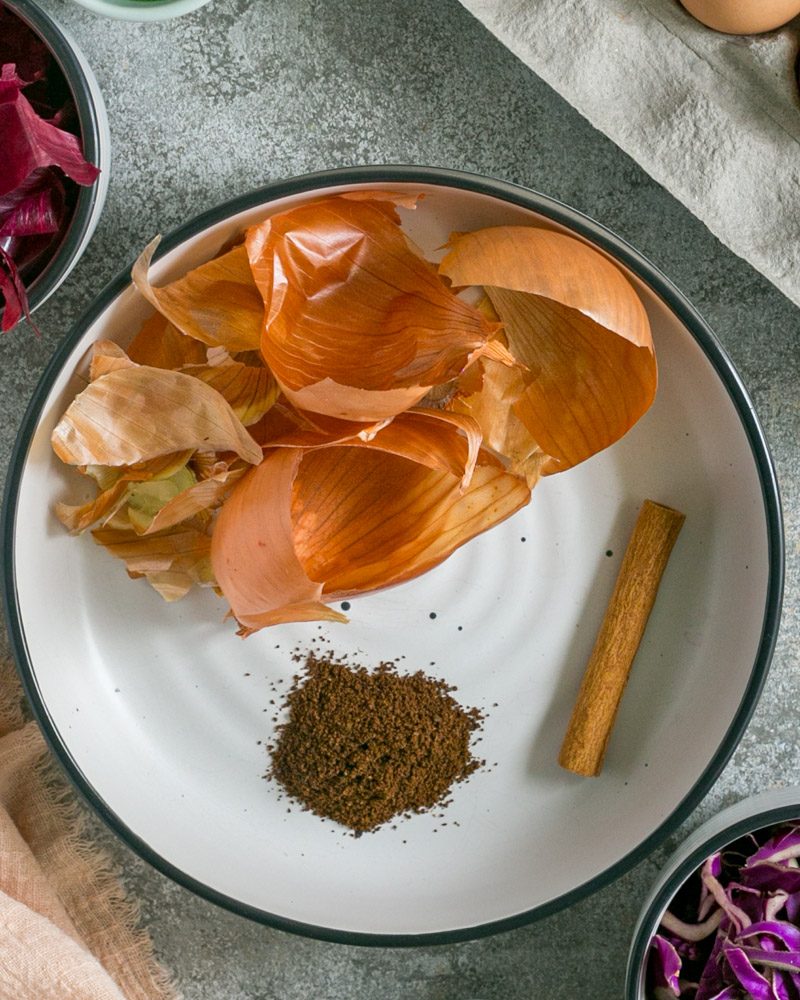
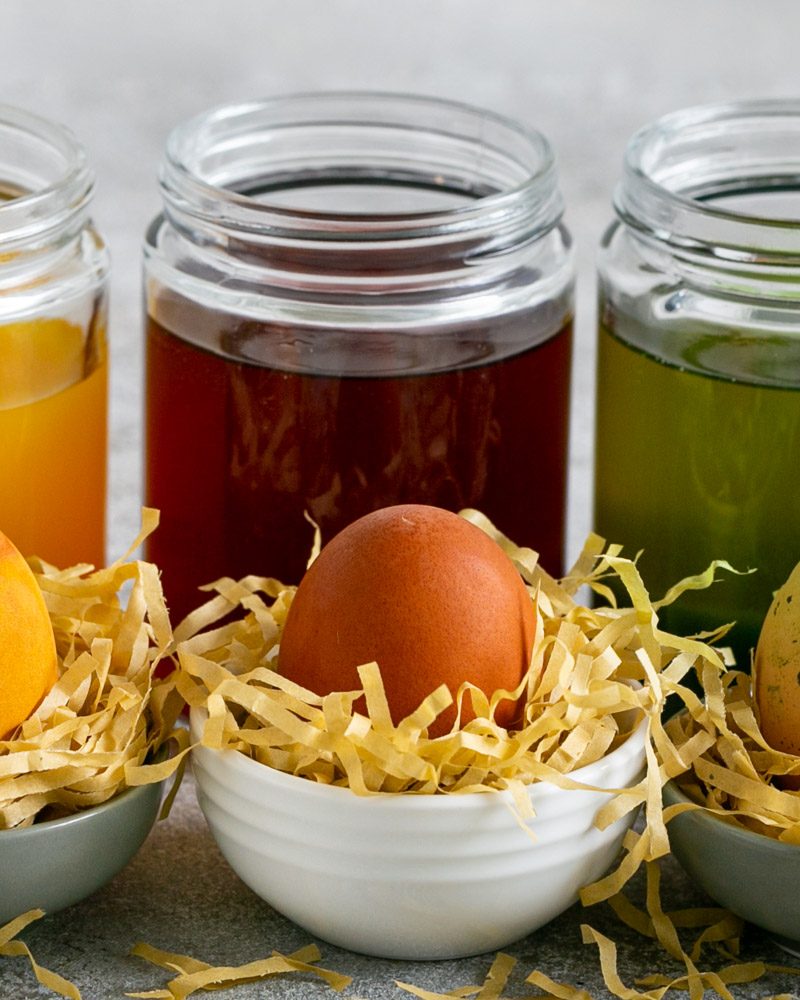
For 500ml we added 1 cinnamon stick, 2 teaspoon coffee powder and the peel from 2 brown onions. Again we boiled all together with 1 teaspoon white vinegar for 20 minutes and cooked the eggs in the strained water for 15 minutes.
With Beetroot and Red cabbage
Last year we used red cabbage to get blue eggs however the result was rather grey, nice but not what we had expected. This year I added beetroot juice to the chopped red cabbage hoping for something between pink and blue. Yes, I know what you must be thinking, they should have turned out purple but guess what? They didn't! The result was a greyish-golden brown colour.
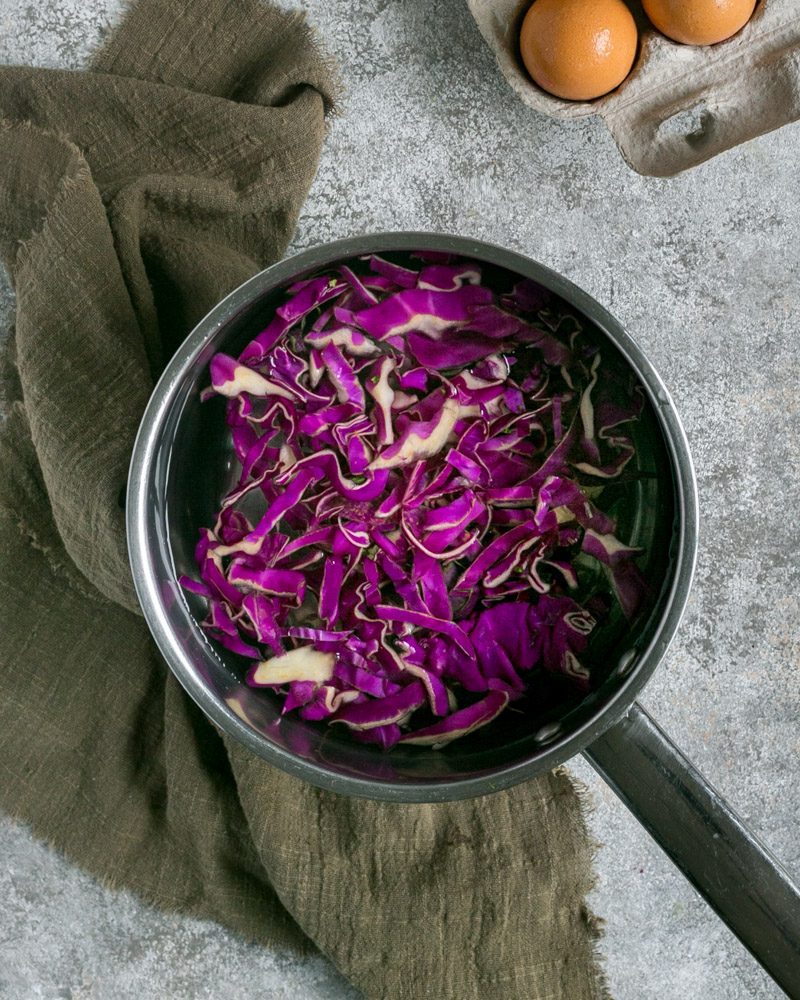
Nice but we might have to experiment again next year. Perhaps there wasn't just enough red cabbage to give the eggs that blue colour we were hoping for.
Here we used 1 cup (80g) of red cabbage and 20ml beetroot juice (from half a large beetroot). We first boiled the water with red cabbage and 1tsp white vinegar for 20 minutes. Then added the beetroot juice to the strained cabbage water. We cooked the eggs for 15 minutes in that water.
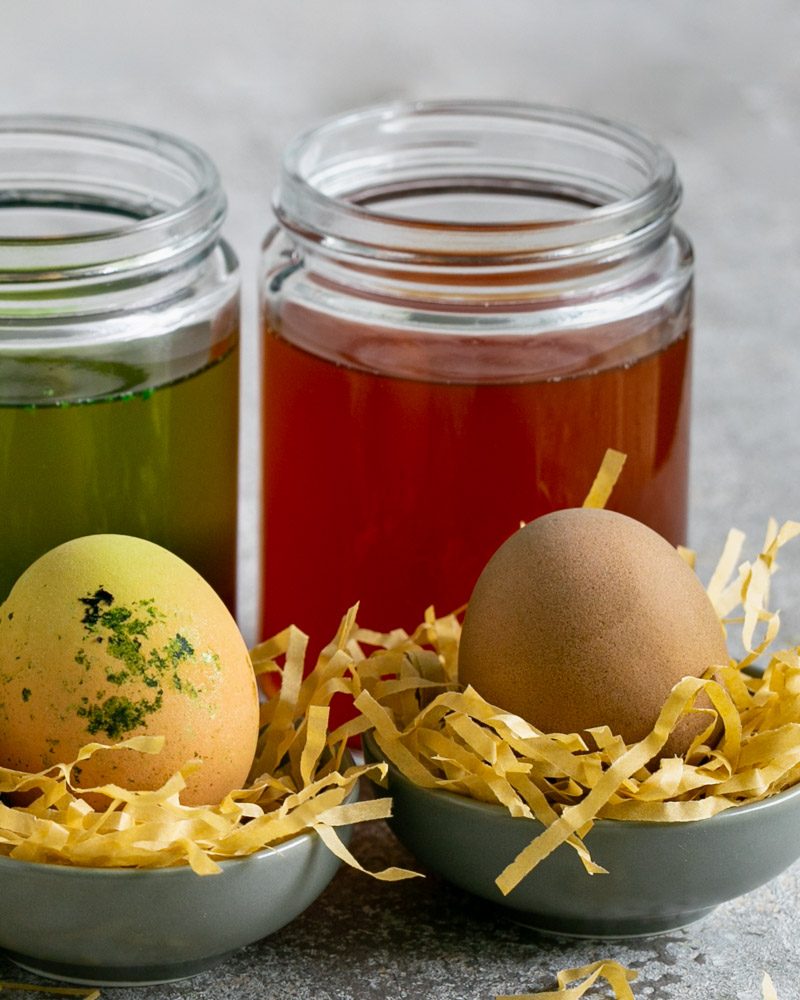
With Spinach
This was our first attempt to use spinach to dye eggs and one that we will have to work on😁 I used 120g spinach to get enough juice. Then added that spinach juice to 500ml water along with 1tsp white vinegar. I brought it all to a boil and then added the eggs.
I cooked the eggs for 15 minutes. The eggs did not take on any colour. Even the next day they had just a yellowish tone with green specks, not what we were hoping for.
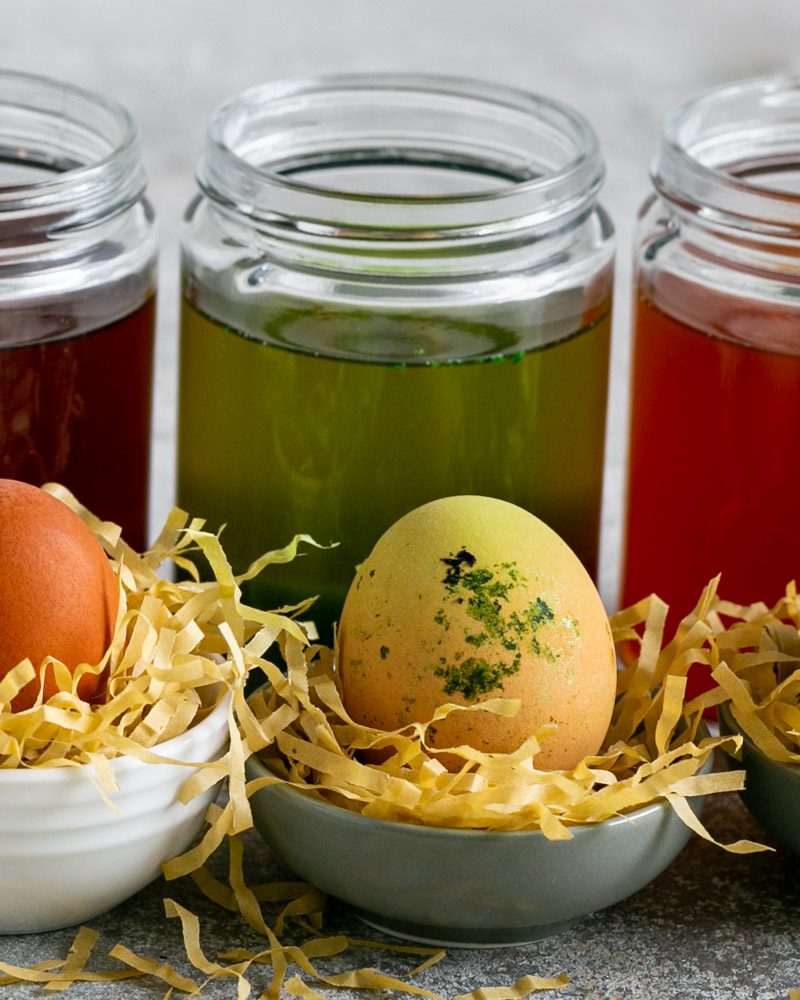
I looked up the net to see what I could have done differently but noticed others had had similar results. Some suggested using parsley or kale for a better result, so will give these a go next year.
BTW: you can keep the colouring water for weeks in the fridge and use them again and again.
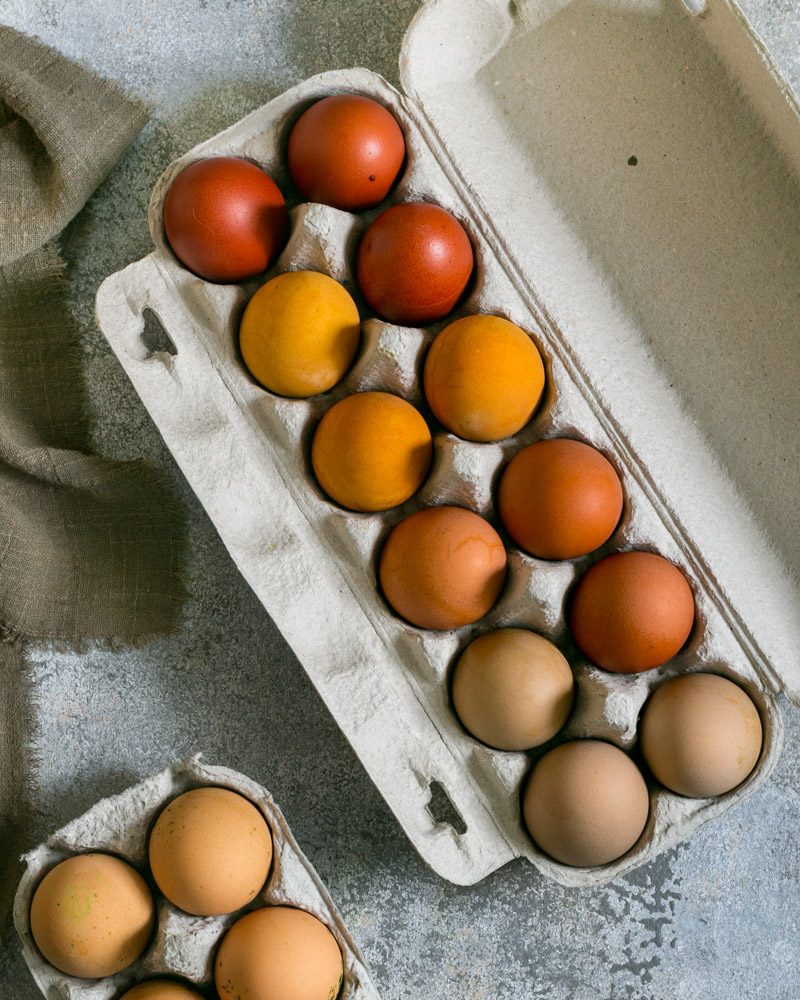
Is it better to use white or brown eggs when using natural dyes?
You can use either! Using white eggs for dyeing Easter eggs, will result in lighter tones. With brown eggs, you will get darker colours which we prefer.
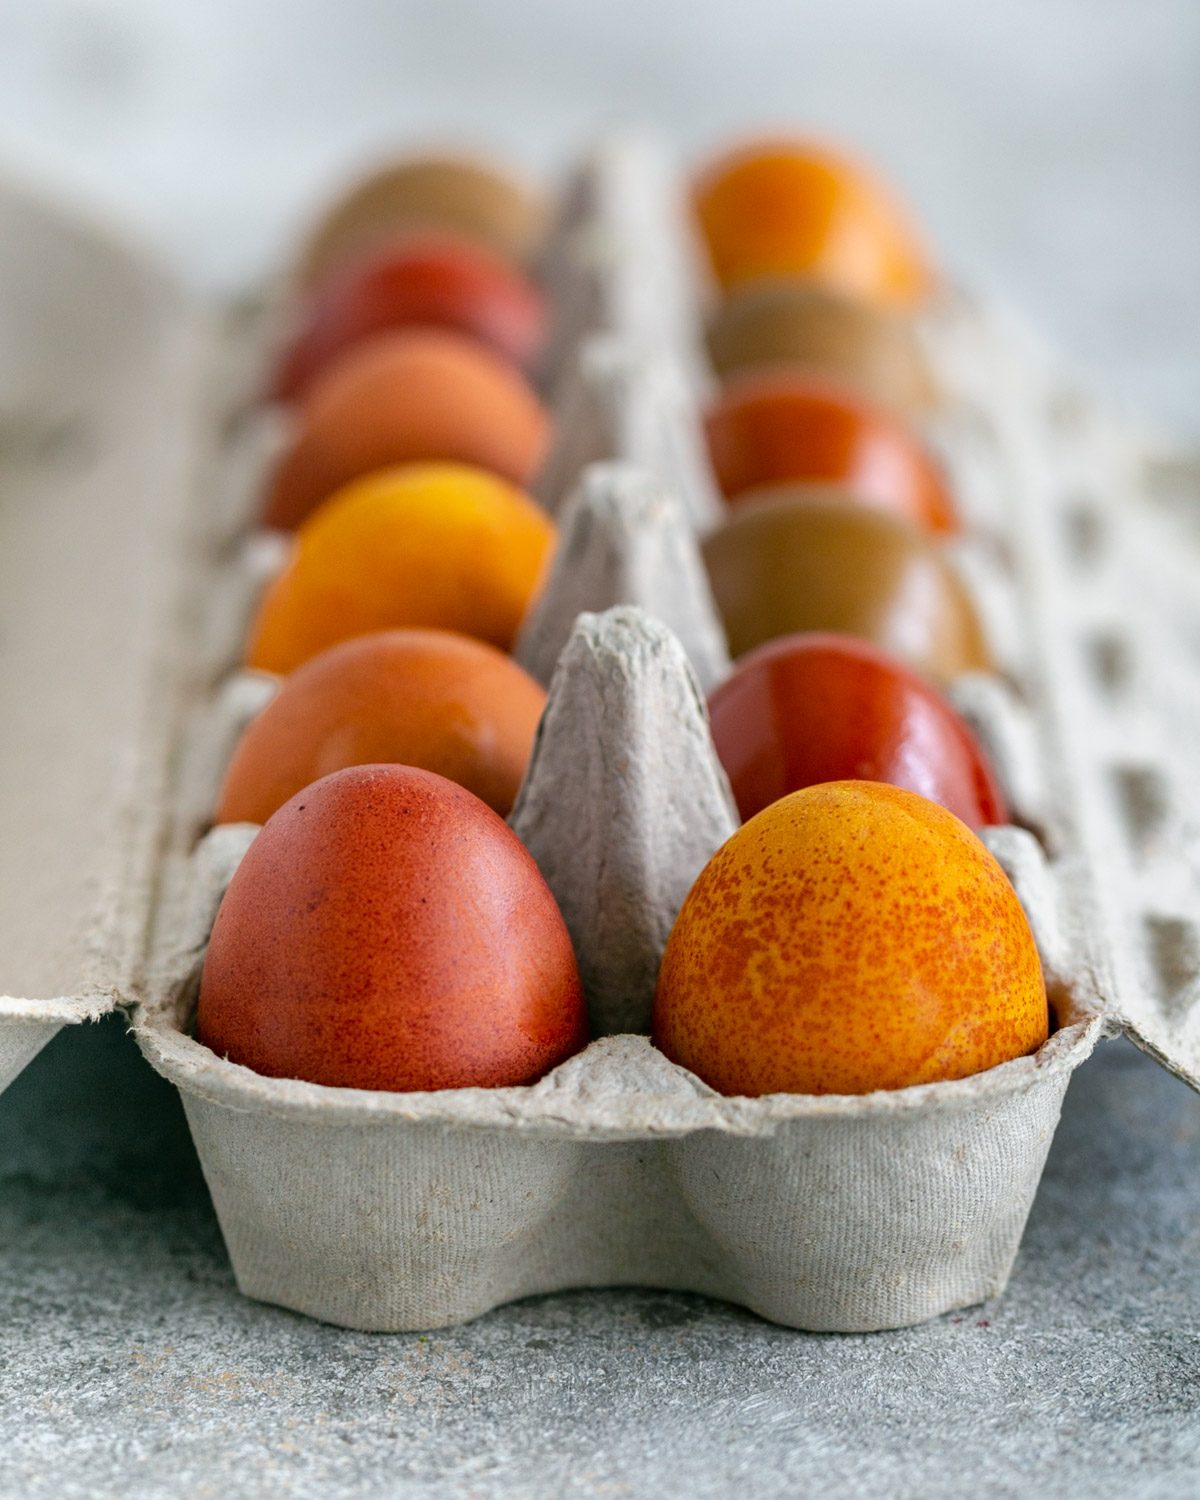
Interestingly, red cabbage and beetroot turned our brown eggs to a greyish colour as opposed to blue or red as we expected. Turmeric however worked beautifully with brown eggs, they came out almost orange in colour.
Note: you get great results when using free range eggs as their shells are thicker hence making them less fragile.
Naturally dyed Easter eggs - This is how it's done!
Here's how we dyed our eggs from start to finish.
First of all you don’t have to pierce the eggs. If you want to avoid eggs from cracking, leave them at room temperature ahead of time for a few hours. Meanwhile prepare your colouring water.
colouring water
Cook the natural ingredients you are using for 20 minutes with a teaspoon of white vinegar. When the water has taken the colour , using a sieve separate the ingredients from the water. Gently add eggs to the coloured water.
cooking eggs
Cook the eggs for 15 minutes. Set them aside in a deep bowl. Now, cover the eggs with the cooking water and allow to cool at room temperature.
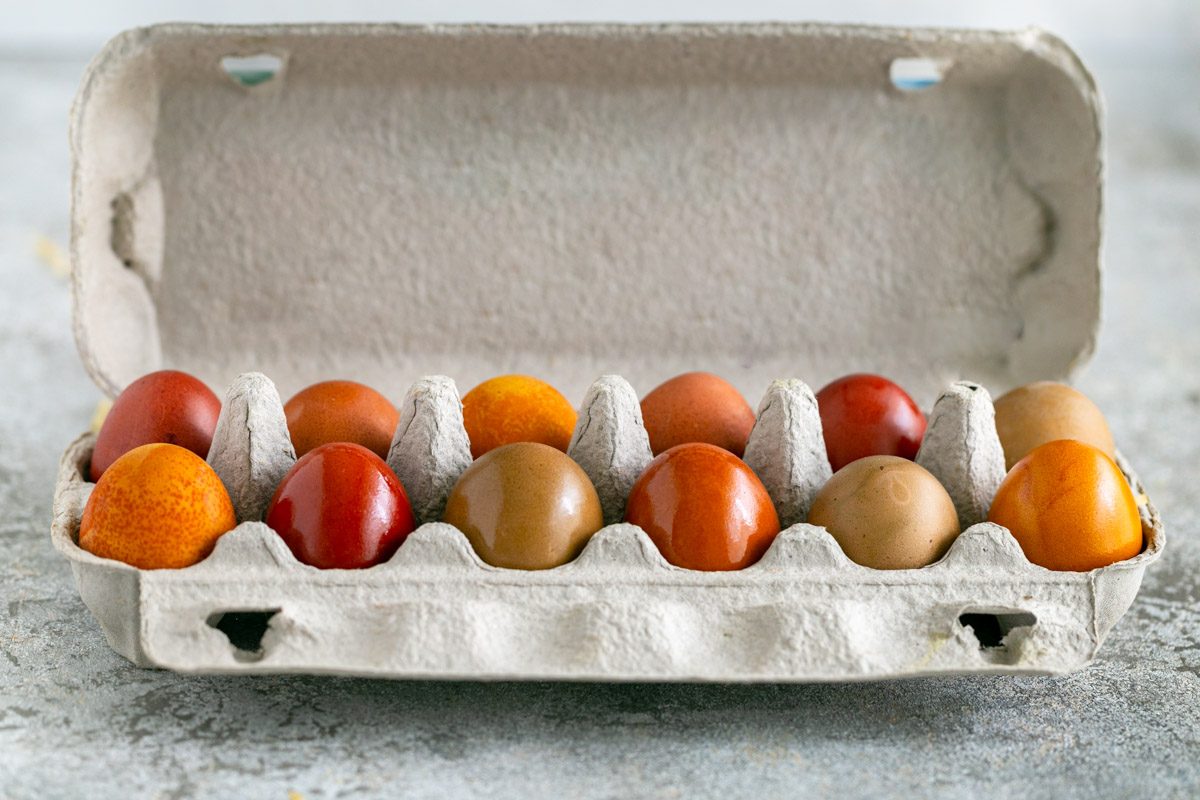
drying coloured eggs
After 2 hours, remove the eggs from the water and place in the egg carton. Leave the eggs to dry. Once they have dried turn them around and dry the other side.
You will notice the eggs already have a deep colour when you take them out from the colouring water. The eggs look nice but if you want better results, then soak the eggs in their colouring water overnight in the fridge. This is what we did.
Next morning we took the eggs out and dried them again from both sides. Once they dried, we brushed them with vegetable oil to give them a shine.
Plan this activity during the week of Easter as you should consume the boiled eggs within 1 week!
More ideas for dyeing eggs with natural ingredients
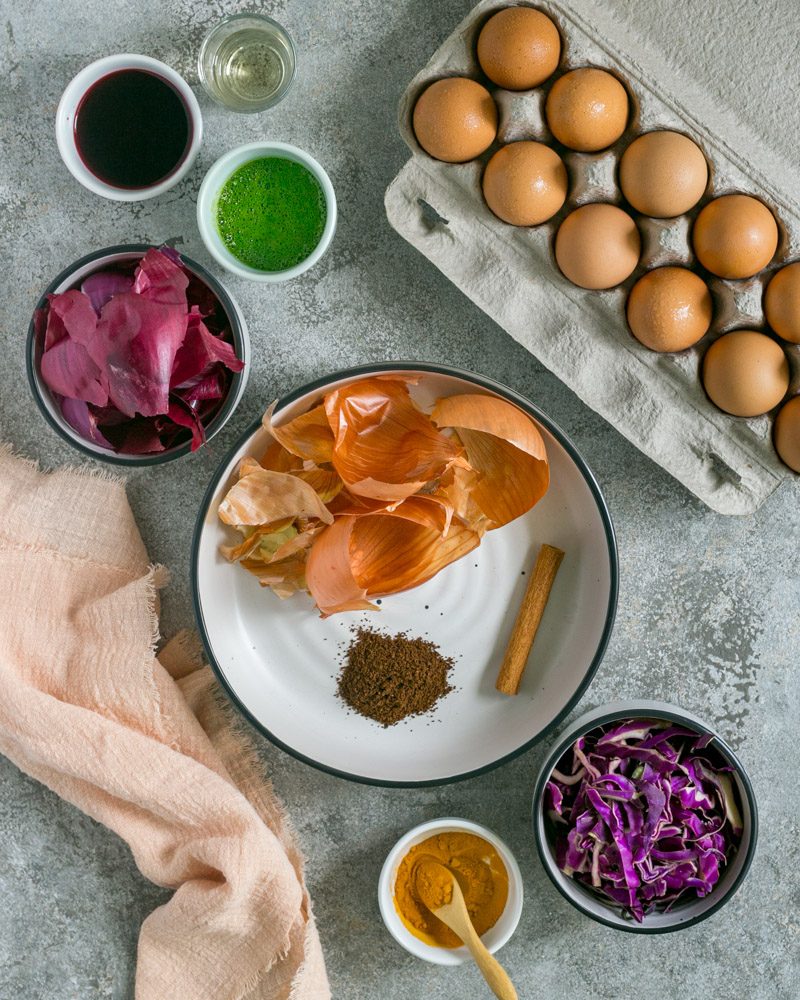
Other natural ingredients you can use:
- Saffron powder-yellow eggs
- Matcha tea- green colour
- Hibiscus leaves-pink colour
- Blueberries-grey-blue colour
- Carrots-orange colour
- Black tea-brown colour
- Fruit tea-red colour
Do you need more ideas for what to make over Easter?
Try our favourite dishes:
Hey, just a thought, how about using these coloured eggs for the egg hunt this year?
Dyeing Easter Eggs the Natural Way
Ingredients
- 15 free range eggs
- 3 red onions, peel only
- 2 brown onion, peel only
- 1 cinnamon stick
- 2 teaspoon coffee powder
- ¼ red cabbage, sliced
- ½ medium sized beetroot, juiced
- 1 tablespoon tumeric
- 120 g spinach, juiced
- 5 teaspoon white vinegar
Instructions
Dyeing with red onion peel
- In a small pot add 500ml (2 cup) of water, 1 teaspoon white vinegar and red onion peels. Bring to a boil and simmer for 20 minutes. Strain and carefully add 3 eggs. Boil the eggs for 15 minutes and transfer into a deep bowl. Pour the coloured water just enough to cover the eggs.
- Leave at room temperature for 2 hours. Remove the eggs and let them dry. Once the eggs are dry from all sides, rub them with a few drops of vegetable oil to give the eggs some shine. If you are looking for a more darker tone place them back in the colouring water and leave in the fridge overnight. The next day remove the eggs and dry them again. Rub them with a few drops of vegetable oil.
Dyeing with brown onion peel, cinnamon and coffee powder
- In a small pot add 500ml (2 cups) of water, 1 teaspoon white vinegar and the brown onion peel, the cinnamon stick and 1 teaspoon coffee powder. Bring to a boil and simmer for 20 minutes. Strain and carefully add 3 eggs. Boil the eggs for 15 minutes and transfer into a deep bowl. Pour the coloured water just enough to cover the eggs.
- Follow step 2 as above.
Dyeing with red cabbage and beetroot juice
- In a small pot add 500ml (2 cup) of water, 1 teaspoon white vinegar and the sliced red cabbage. Bring to a boil and simmer for 20 minutes. Strain and carefully add 3 eggs and the beetroot juice. Boil the eggs for 15 minutes and transfer into a deep bowl. Pour the coloured water just enough to cover the eggs.
- Follow step 2 as above.
Dyeing with turmeric powder
- In a small pot add 500ml (2 cup) of water, 1 teaspoon white vinegar and the turmeric powder. Bring to a boil. Carefully add 3 eggs. Boil the eggs for 15 minutes and transfer into a deep bowl. Pour the coloured water just enough to cover the eggs.
- Follow step 2 as above.
Dyeing with spinach
- In a small pot add 500ml (2 cup) of water, 1 teaspoon white vinegar and the spinach juice. Bring to a boil. Carefully add 3 eggs. Boil the eggs for 15 minutes and transfer into a deep bowl. Pour the coloured water just enough to cover the eggs.
- Follow step 2 as above.


Claude VAUTE
Thank you !
Lucette
Beautiful colours with natural ingredients: great!
Renu
Bravo!
Steve
Love the usage of natural ingredients